New documents and document setup
Starting a document, import, title, Document settings, Generate draft prerequisites, and the in-editor Refine menu.
This article describes how to start a document, what lives under Document settings (gear in the document title bar), and how to use the Refine menu in the editor for selection-level AI. For full-document generation, see Full-document AI drafting.
Starting a new document
Fig 8
New document is the flow opened by New document in the sidebar or the Library rail header on /documents.
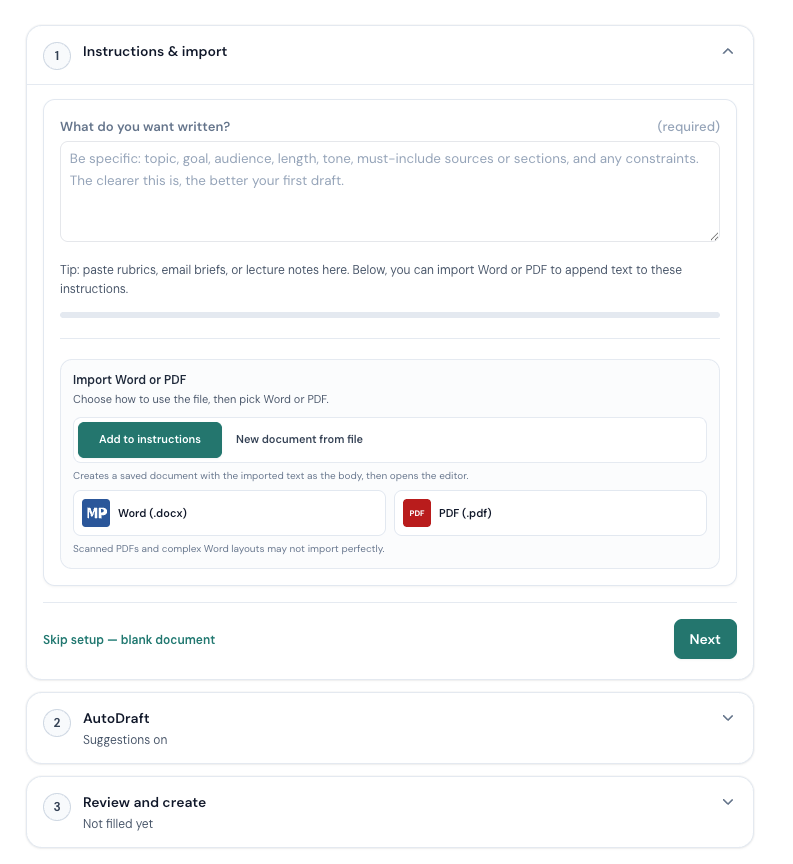 Fig 9
Fig 9
It includes:
- Title — set it at the top of the editor so the file is easy to find.
- Optional import — when offered, bring in a Word file so the body starts from your existing draft.
- Document settings — open the gear icon in the document title bar to fill any required setup fields your workflow shows before Generate draft or other AI actions.
Exact steps depend on your plan and how your school or team configured Clarami.
Document settings
Open Document settings from the gear icon in the document title bar on a saved document.
Open Document settings from the gear icon in the document title bar on a saved document. There you will typically find:
- Structured fields and options your workflow shows (assignment type, audience, length, and similar)—including anything required before Generate draft runs.
- AutoDraft, bibliography / citation style, and collaboration controls when your plan exposes them in this panel.
- Share stays on the title bar for this document (see Sharing: documents vs Library folders). Quick Export (Word, copy HTML, LaTeX when enabled) uses More document actions (⋯); cloud upload may tie to Account → Integrations (exact list depends on your plan and deployment).
Fill what the UI marks as required before you run Generate draft, or the action may stay disabled or stop with a validation message.
Refine menu
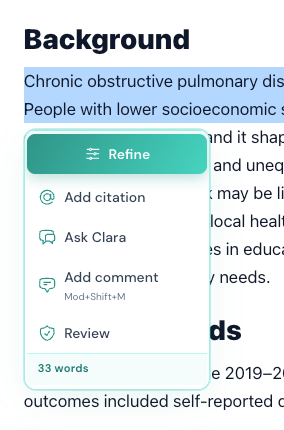 Fig 9
Fig 9
When you select text in the editor, Clarami shows a Refine control stack next to your selection (the layout scrolls so the stack stays usable in the viewport). That is the Refine menu for paragraph-scale edits.
Click the Refine menu icon to open the menu.
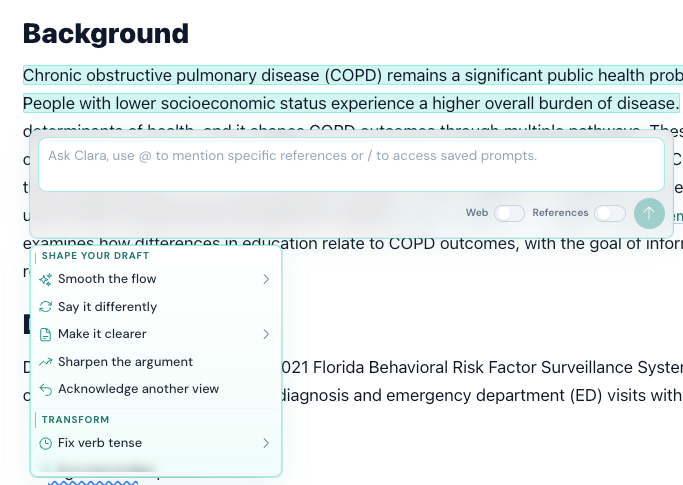 Fig 10
The Refine menu is for paragraph-scale edits. It includes a short instruction field where you describe what you want done to the selection, plus optional Web and References toggles when your plan and environment allow extra context for that request.
Quick actions grouped into rows such as Shape your draft, Smooth the flow, Make it clearer, Fix verb tense, Transform (for example bullets, flowing prose, or a simple table layout), Translate, Academic polish, and Humanize when it is available. Rows with a chevron open a flyout with more specific variants; on touch devices you tap to open and close these groups.
After you run an action, a Refine preview lets you Accept the revision, Try again, or Reject it before it replaces your selected text.
Refine uses AI words (where your plan meters them) and needs an internet connection when the action is server-backed.
After generation
Edit freely in the rich-text editor. Long runs count toward monthly AI words on metered plans. See Full-document AI drafting and Subscription and plans.
Older links
Bookmarks that pointed at a separate research modes or templates catalog may redirect into Workspace; use New document, Document settings, and the Refine menu in the editor for drafting work today.